
These instructions are meant to help guide you through the process of setting up Java and the BlueJ integrated development environment on a personal computer running Microsoft Windows. Installing the software on your personal computer is optional; you have access to the software in the computer labs on campus. I have installed the software and used it on several different computers running Windows XP, Windows Vista, and Windows 7. In none of my installations have there been any problems caused by installing and using the software. However, I cannot guarantee that you will have no problems. If you choose to install the software on your own computer, you do so entirely at your own risk.
Install the Java Development Kit software first. This software includes the Java compiler, the Java API (Application Program Interface) files, and the Java virtual machine (which executes compiled Java programs). The table below contains some useful links.
| Java Technology Home Page | https://java.sun.com |
| Java Software Download Page | https://java.sun.com/javase/downloads/index.jsp |
The instructions that follow were written at the beginning of August. I cannot guarantee that the Java website will look exactly the same when you read this as it did then. However, unless the website has been drastically altered, you should be able to follow the directions even if the screen shots are not completely up-to-date.
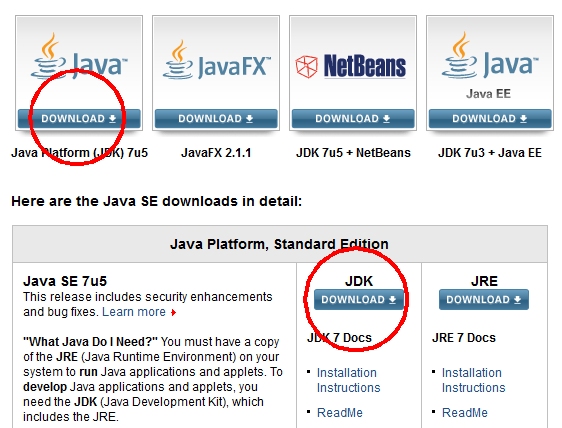
a. I suggest you open the download page in a new tab (or a new window). On the download page you will find several options. You want to download the Java SE (Standard Edition) JDK (Java Development Kit). You can use either of the circled links shown below to begin the process:
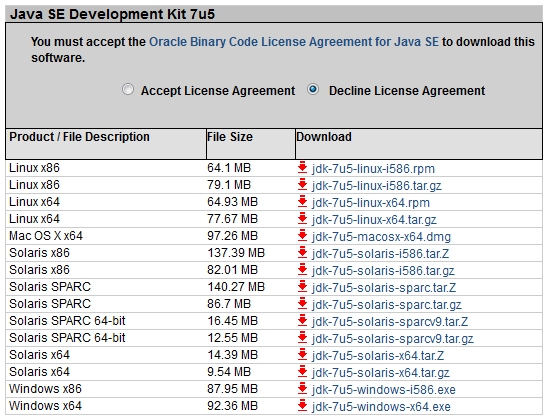
b. On the next page, you should read the license agreement and if you want to continue then you will need to accept the license agreement and then click the link for the version that you want. The i586 version is for machines running the 32-bit version of windows and the x64 version is for machines running the 64-bit version of Windows.
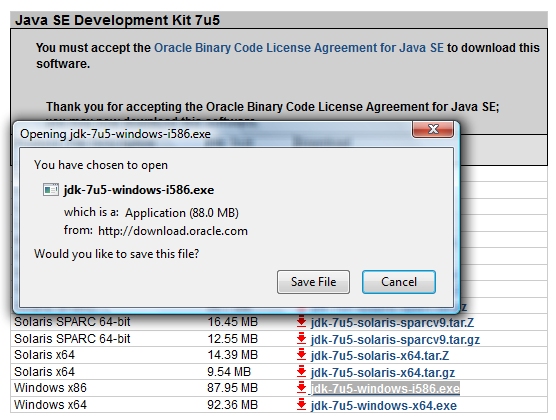
c. Your browser should open a download dialog. Just click the Save File button to continue.
d. After you've downloaded the installation program, run it to install the Java SE Development Kit software on your computer.
You may also want to download the Java SE 7 documentation. The advantage of downloading the documentation to your own machine is that you do not have to be connected to the internet to access it.
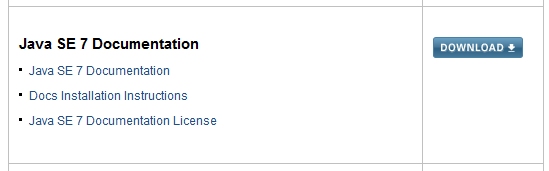
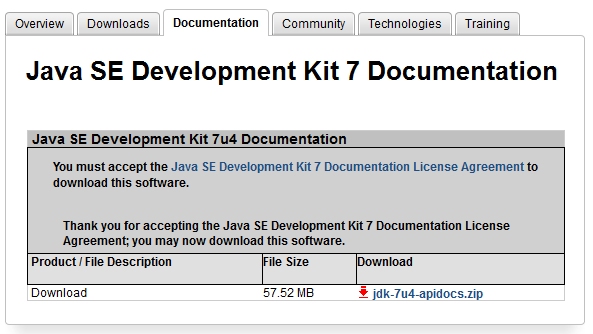
a. The documentation can be downloaded from the same Java software download page you started at in step one above. You should be able to use the back button on your browser to get back to that page. Scroll down the page until you find the Java SE 7 Documentation section and then click the download button.:
b. You'll need to check the box to accept the license agreement and then click the link to the zipped documentation file:
c. You want to save the documentation file on your hard drive:
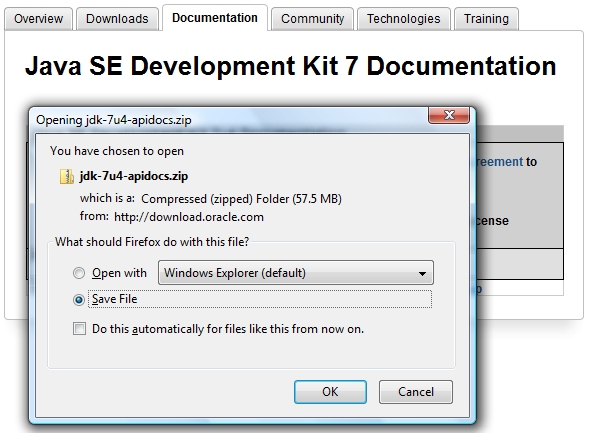
Do not unzip this file yet! We'll get to that a little further down the page (in Step 4).
BlueJ is a free integrated development environment (IDE) that allows you to edit, compile, and run Java programs. The table below contains some links you might want to follow.
| BlueJ Home | https://www.bluej.org |
| BlueJ Software Download | https://www.bluej.org/download/download.html |
| BlueJ Documentation | https://www.bluej.org/doc/documentation.html |
a. I suggest you open the software download page in a new tab. Be sure to download the Windows version of the software. Compared to the Java downloads, the BlueJ download is small. You'll notice that the instructions tell you to make sure that you have already installed an appropriate version of Java which you did in step one above.

b. Run the installation program you just downloaded to install BlueJ on your computer. I recommend that you do not change any of the default options during the installation process. The default location for the BlueJ IDE is in a folder named "C:\BlueJ".
You can view the BlueJ tutorial and the BlueJ reference manual (and other documentation) on the BlueJ documentation page. Both of these are PDF (Adobe Portable Document Format) files. To view them you need Acrobat Reader which you can get from Adobe.
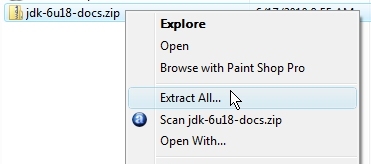
a. If you have downloaded the Java SE 7 documentation file in step 2 above, unzip it by right-clicking on the file icon and selecting the Extract All... option:
b. In the extraction dialog, make sure that you are extracting the Java documentation to the BlueJ folder:
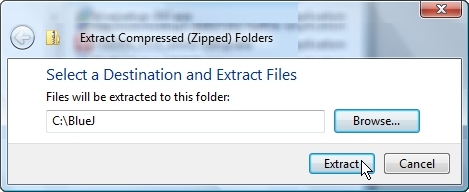
When the compressed file has been unzipped, the documentation will be inside the C:\BlueJ\docs folder. It takes a long time to extract the documentation so be patient.
On the help menu of BlueJ is an option to open the Java documentation (Java class libraries). By default, these documents will be located on the internet and you must be connected to the internet to open them. To access the local copies of these documents (from steps 2 and 4 above) follow these instructions:
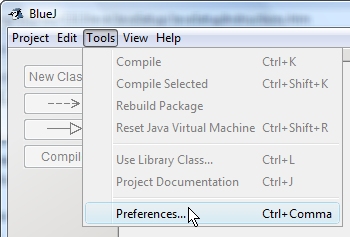
a. Run BlueJ and select the Tools menu on the menu bar:

b. Choose the Preferences option in the Tools menu:
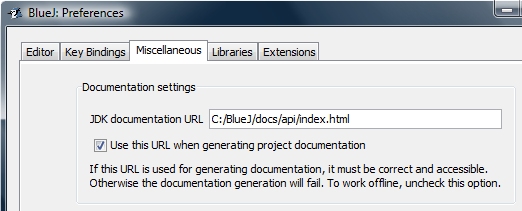
c. Select the Miscellaneous tab:

d. Enter the location of your local documents in the documentation URL text box and check the check box just below it. If you have followed all of the recommendations given above, your documents will be located in the same directory as mine:
e. Close the BlueJ Preferences dialog by clicking the OK button. Back in BlueJ, open the help menu and select the Java Class Libraries option:
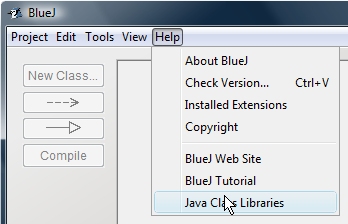
The Java documentation should open in a browser window.
When you create a new class in a project, BlueJ uses a template file to create a skeletal version of the new class. (It is not important, at this point, that you know what a class is.) BlueJ comes with several template files and in this step you will add some new ones. Right-click on each of the links below (one at a time), choose the Save Link As option, and save the file in the directory "C:/BlueJ/lib/english/templates/newclass".
Finally, add the style checker extension to BlueJ. This is an extension of BlueJ that checks your source code for good programming style. Good style makes a program easier to read and to debug (find and fix errors). Before submitting a project, you should check the style of your project and correct any reported problems (they are called "errors" but are really just problems with your style).
Download the file checkstyle-extension-4.3-0.jar to the "C:\BlueJ\lib\extensions" folder. (Right-click on the link, select the Save Link As option, and save the file in the "C:\BlueJ\lib\extensions" folder.)