
These instructions are meant to help guide you through the process of setting up Java and the BlueJ integrated development environment on a personal computer running Mac OS X. Installing the software on your personal computer is optional; you have access to the software in the computer labs on campus.
I do not have access to a Mac so I am unable to test these instructions. I cannot guarantee that you will have no problems. If you choose to install the software on your own computer, you do so entirely at your own risk.
a. The instructions for loading Java on a Mac are at https://docs.oracle.com/javase/7/docs/webnotes/install/mac/mac-jdk.html. The installation documentation indicates that you need OS X version 10.7.2 or later. If you have an earlier version of the operating system, Java is probably already on your computer. The installation instructions in the preceding step include instructions on how to check if you already have Java on your Mac. If so, jump down to step 2.
Install the Java Development Kit software first. This software includes the Java compiler, the Java API (Application Program Interface) files, and the Java virtual machine (which executes compiled Java programs). The table below contains some useful links.
| Java Technology Home Page | https://java.sun.com |
| Java Software Download Page | https://java.sun.com/javase/downloads/index.jsp |
The instructions that follow were written at the beginning of August. I cannot guarantee that the Java website will look exactly the same when you read this as it did then. However, unless the website has been drastically altered, you should be able to follow the directions even if the screen shots are not completely up-to-date.
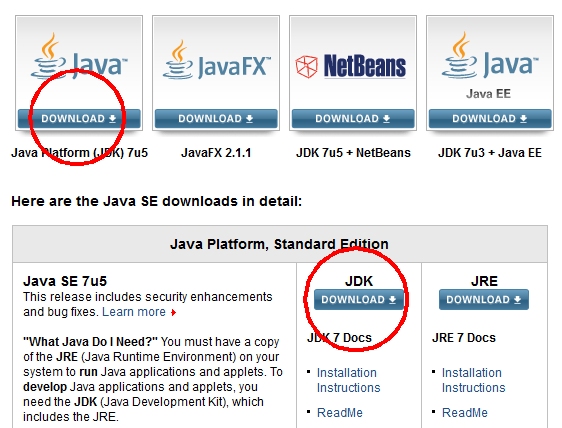
b. I suggest you open the download page in a new tab (or a new window). On the download page you will find several options. You want to download the Java SE JDK (Standard Edition Java Development Kit). You can use either of the circled links shown below to begin the process:
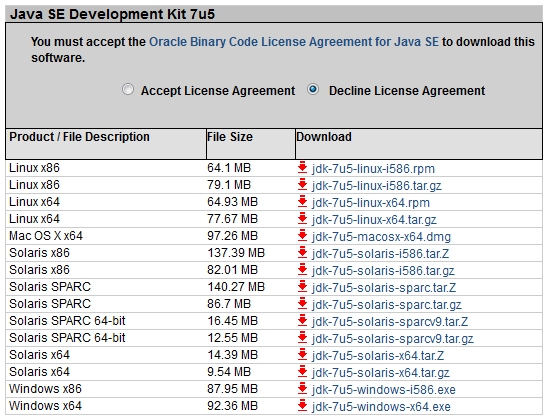
c. On the next page, you should read the license agreement and if you want to continue then you will need to accept the license agreement and then click the link for the Mac OS X version:
Follow the installation instructions from part a above to complete the installation.
BlueJ is a free integrated development environment (IDE) that allows you to edit, compile, and run Java programs. The table below contains some links you might want to follow.
| BlueJ Home | https://www.bluej.org |
| BlueJ Software | https://www.bluej.org/download/download.html |
| BlueJ Documentation | https://www.bluej.org/doc/documentation.html |
Go to the download page and be sure to download the Mac OS X version of the software:

According to the BlueJ installation instructions, all you have to do is expand the install file and move the resulting folder to your preferred location (for example Applications). They also recommend that you update to the latest Java version (via the Software Update feature).
You can view the BlueJ tutorial and the BlueJ reference manual (and other documentation) on the BlueJ documentation page. Both of these are PDF (Adobe Portable Document Format) files. To view them you need Acrobat Reader which you can get from Adobe.
When you create a new class in a project, BlueJ uses a template file to create a skeletal version of the new class. (It is not important, at this point, that you know what a class is.) BlueJ comes with several template files and in this step you will add some new ones. Right-click on each of the links below (one at a time), choose the Save Target As option, and save the file in the "BlueJ/lib/english/templates/newclass" folder.
Finally, add the style checker extension to BlueJ. This is an extension of BlueJ that checks your source code for good programming style. Good style makes a program easier to read and to debug (find and fix errors). Before submitting a project, you should check the style of your project and correct any reported problems (they are called "errors" but are really just problems with your style).
Download the file checkstyle-extension-4.3-0.jar to the "BlueJ\lib\extensions" folder.